Promote is used to change the Status of an item to the next Status in its Lifecycle.
Promoting from an Item List
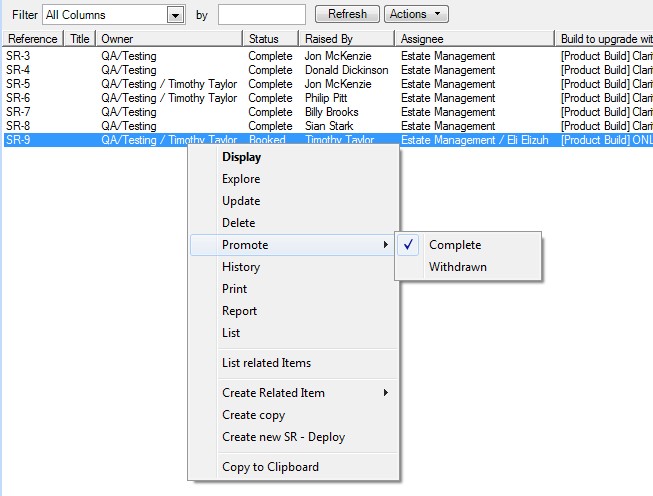
Right-click the Item (from any of the many places it can be listed in, e.g. the Item Explorer) and select Promote from the context menu.
See How do I Find an Item for help in finding the item you wish to Promote.
The Promote Menu will normally be populated with all the valid next states. The exception to this is when selecting multiple items or if the list contains Object Specs rather than the full item details. In these cases the user clicks on the Promote menu item and a window will appear with more options.
The Status that is defined to be "normal" (the natural progression of the item through its lifecycle) will be ticked.

In the example above the item, which has a status of Booked, can be promoted to a next status of Complete or Withdrawn. Complete is the natural progression and so is highlighted with a tick.
Promoting Multiple Items from an Item List
If multiple items are selected then right-click Promote will prompt for the requited 'to' status and promote all the selected items to the new Status.
If the selected items are not all at the same 'from' status then an error may be shown if there is no valid transition between the 'from' and 'to' statuses.
Promote an Item When Displaying It
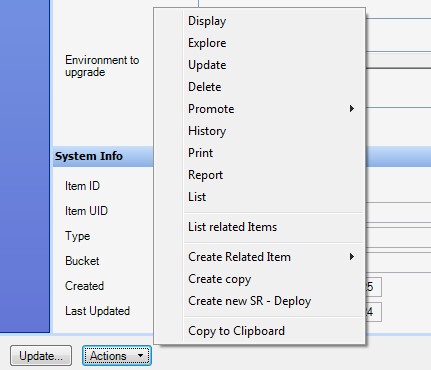
Click the Actions button at the bottom of the Item Details window and select Promote from the popup menu as above

Note: There is no "Promote" option available when in update mode. The user is already in the middle of one operation and so should complete or cancel that first
Promote Window
After selecting the relevant promotion option the Promote window is displayed to complete the task.


